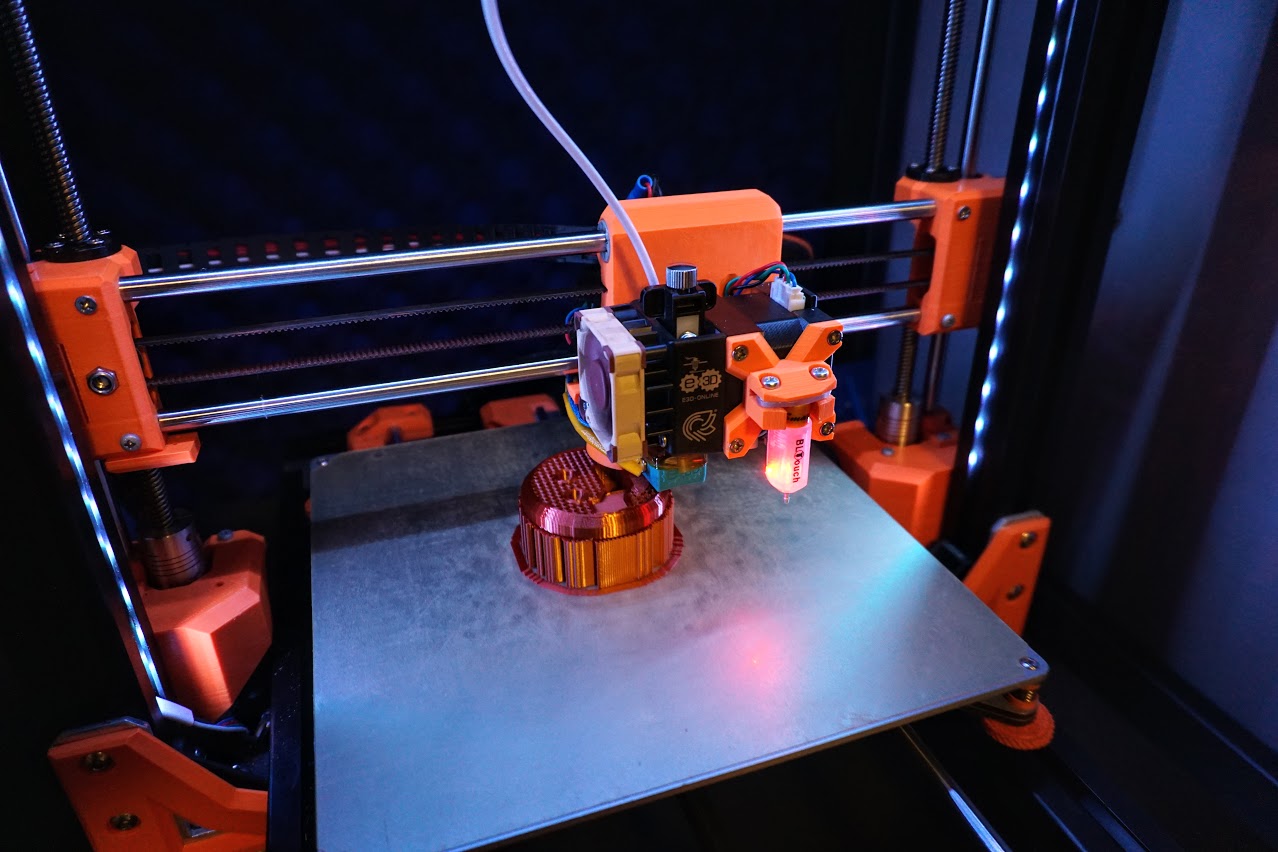
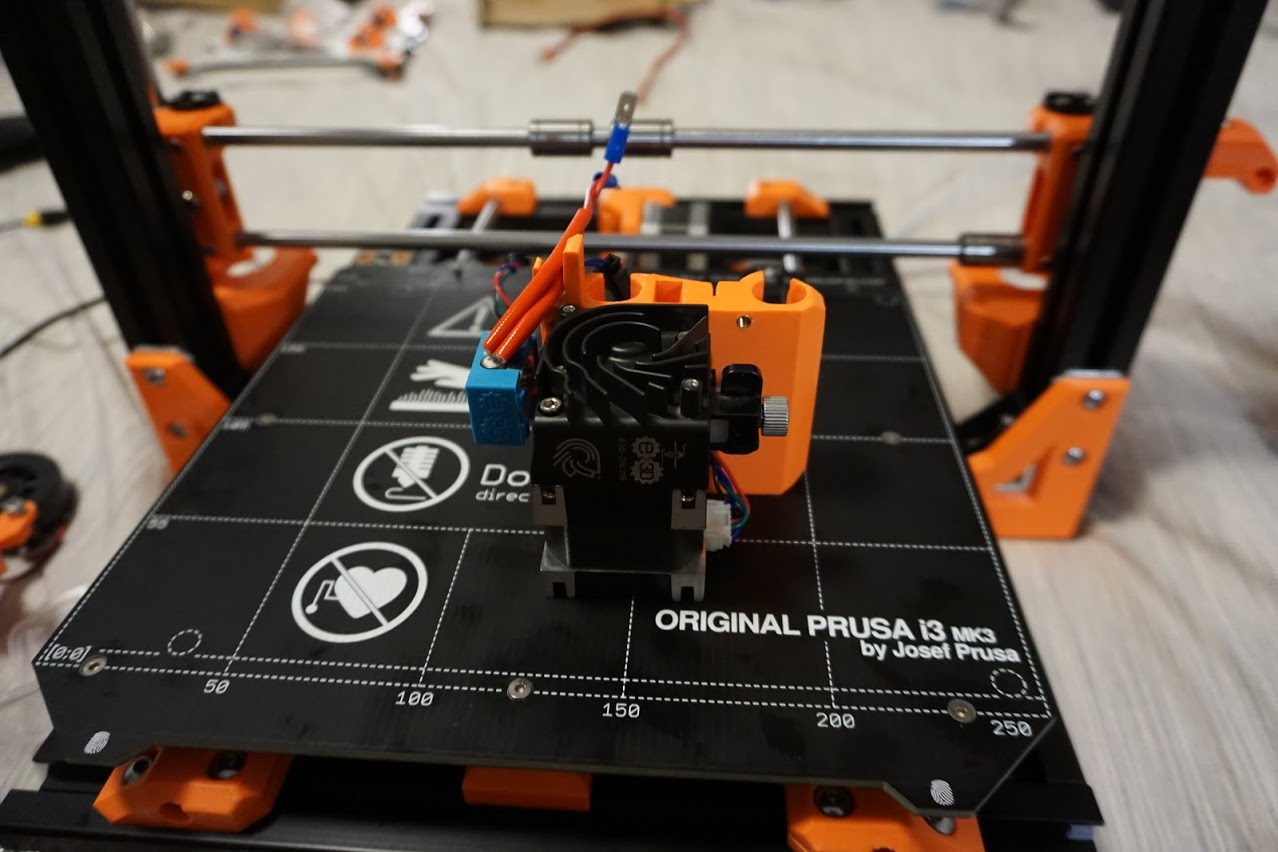
This E3d Hemera mount features; full hot swap capabilities with only 3 screws, a Bltouch sensor mount, the latest MK3s R4 cooling duct, cable organizing channels, Full nozzle visibility and full usability of the X Axis. A MK3s filament sensor is currently undergoing testing and will uploaded soon. A PINDA2 probe mount will also be available shortly.
This mount was designed to be as compact as possible within the available space. The Z height and width profiles are minimized while keeping it as strong and light as possible. The Hemera is a wide extruder / hotend system with an offset mount which made it a challenge to design a mount that kept full x axis usability.
This mount is designed primarily for the ReDuplicator MK3sx which started life as a Wanhao Duplicator i3. Unfortunately due to the Hemera size and and offset, the common ReDuplicator x-carriage used for the MK10 and titan could not be carried across. The original ReDuplicator files are available here. Although the mount is designed for the ReDuplicator, it should also be compatible with the Prusa MK3/s with some small changes to trigger the TMC endstops correctly.
The new fan shroud is based on the Prusa MK3s R4 duct. It results in much better overhangs and more consistent performance than the R3 and R2 Prusa fan ducts.
Please ensure sure your Re-duplicator idler part is the new V2 or newer design as it includes additional mounting points for the X endstop. The X-axis endstop is mounted on the bottom of the X-axis idler part. However if you’ve already printed the original idler V1, new holes can be drilled in at 5mm intervals with a 1.5mm drill bit. I highly recommend upgrading to TMC steppers for this as it is much easier to setup with sensorless homing.
The printed parts should be a minimum of 3 perimeters and 20%+ infill. The printed parts required are:
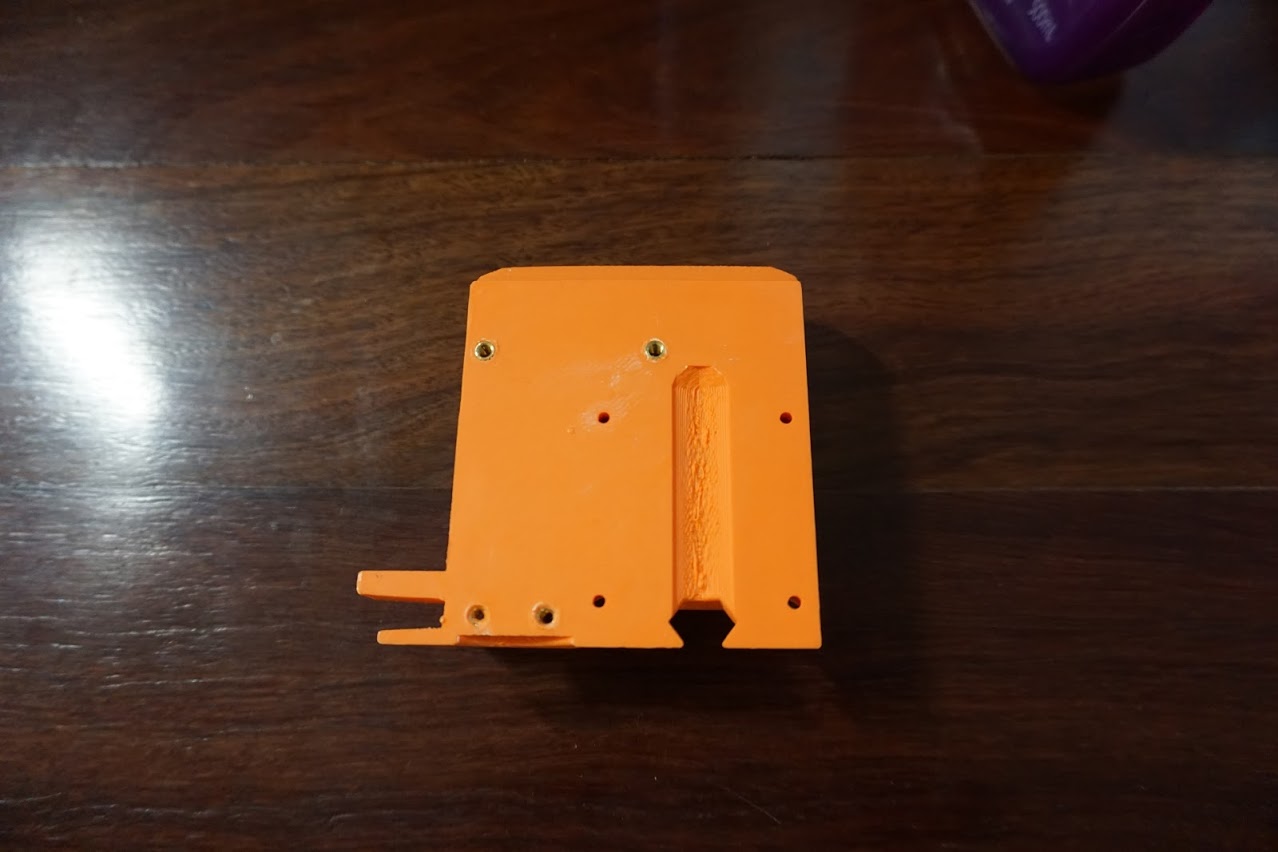
- Hemera X Carriage Plate.
- Hemera Cooling Duct
- Hemera Fan Mount
- Hemera Endstop (For TMC Sensorless homing)
- Hemera BLTouch Mount (optional).
Additional Hardware includes:
- M3 Heatserts x4-6 M3-UHBRHESF
- M3 Screw 20-25mm x3
- M3 Screw 8mm-10mm x3
- Countersunk M3 8mm screw x4 (for Bltouch mount)
- M3 12mm screw (Bl touch mount)
- Hemera Hotend with provided mounting screws
- M3 Nylock nuts x4
- M4 30mm Bolt
- M4 Nylock Nut
- M4 Soft Washer
The installation process is very similar to the original MK10 hotend and the titan Aero. Four Heatserts are placed into the back of the extruder plate.
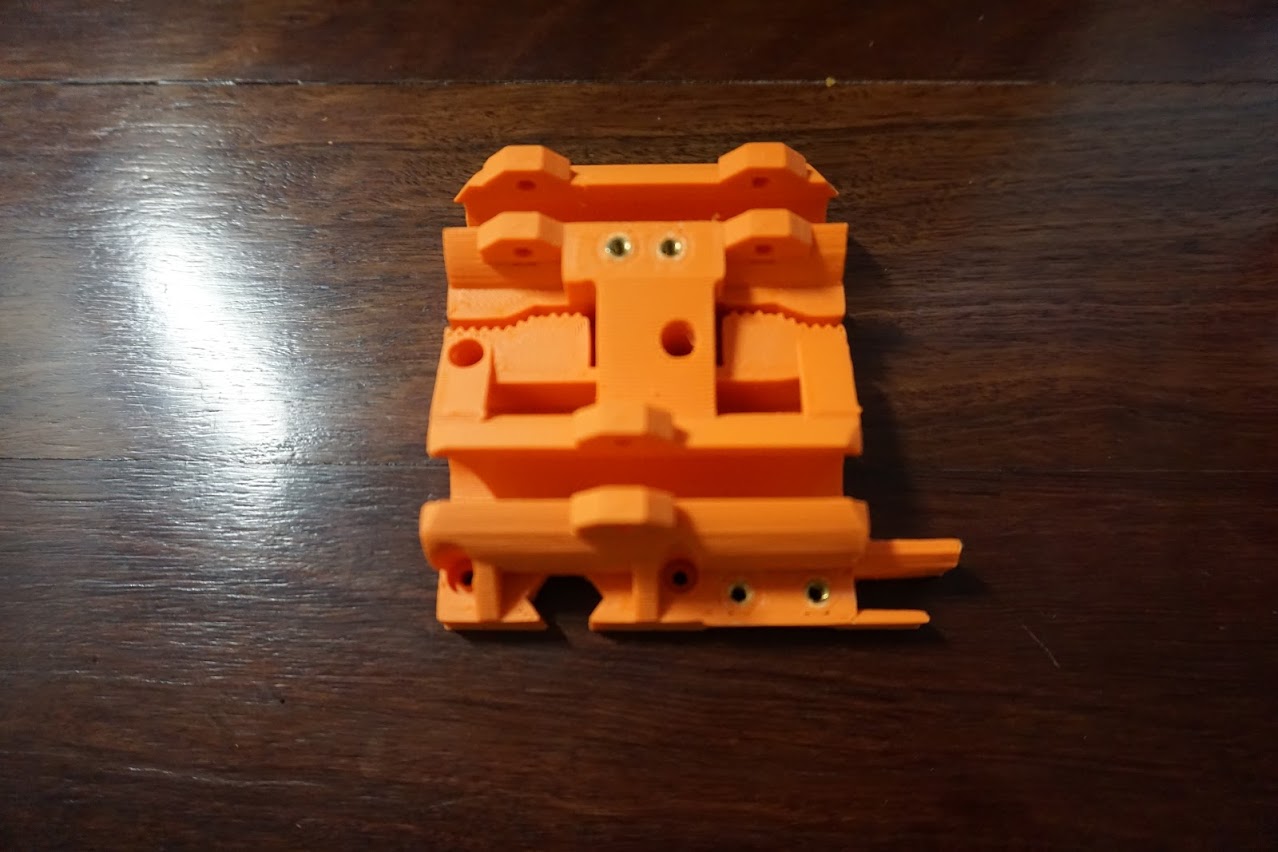
Two optional heat serts are inserted into the front of the carriage. This is only required if you intend to use the MK3s optical filament sensor.
Follow the Hemera core and direct assembly guides here The Hemera is mounted to the plate with the provided 4 bolts. I recommend re terminating all wires in order to make maintenance and swapping the hotend assembly easier. Dupont connectors are perfect for most wires and spade connectors are used for the hotend. The stepper motor wiring can be fed through the provided channel and fed through the underside.
The carriage can then side onto the X axis. The 3 bearings can slide into the bearing slots. Use the 20-25mm M3 screws and nylocks to secure the bearings. Be sure not to over tighten these screws, ensure the pressure on the bearings is even and the carriage should slide freely.

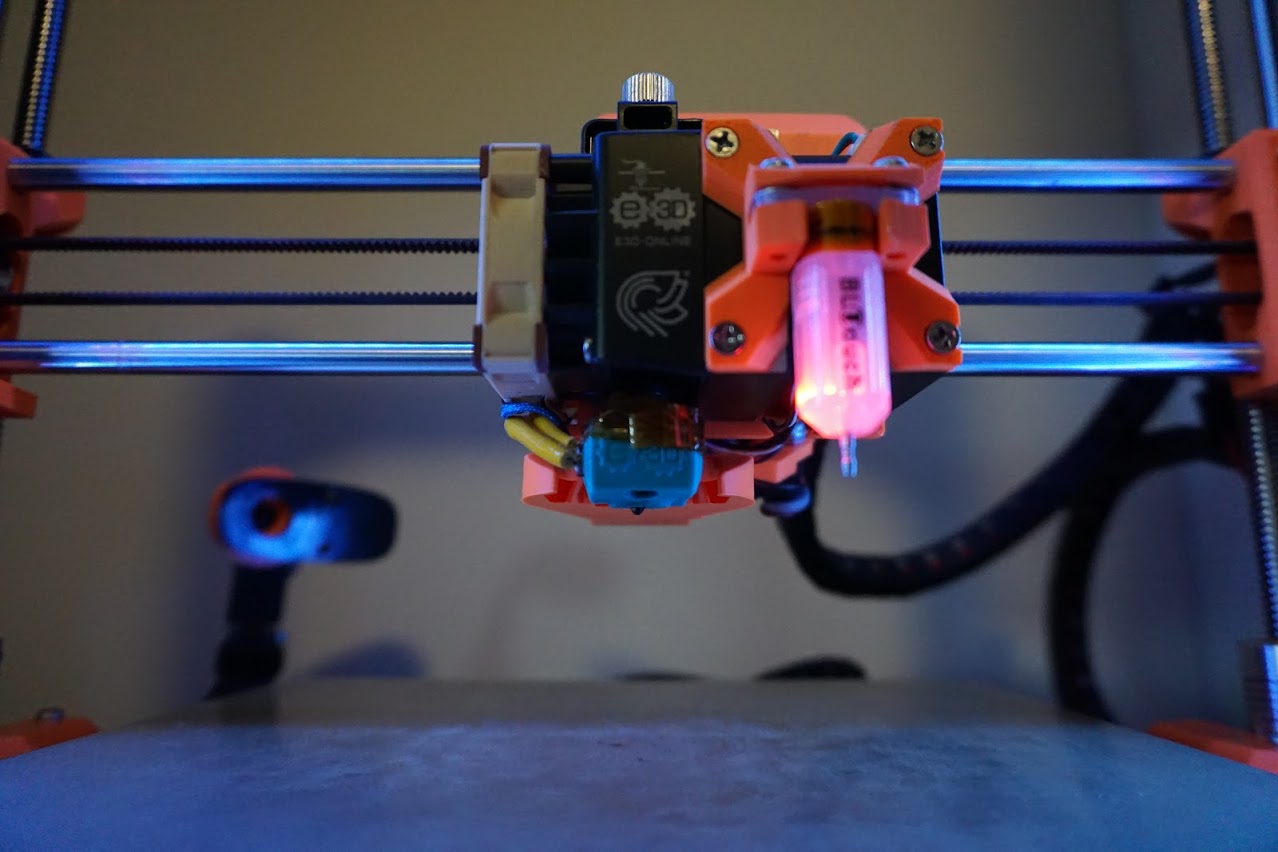
The fan mount connects to the fan shroud via a 10mm M3 bolt and Nylock. The 50mm blower fan is connected with the 30mm M4, Nylock and soft washer. The soft washer in between will help to reduce vibrating fan noise. Once the heating block is centered properly, connect the cooling fan duct to the carriage with 2x 8-10mm m3 screws into the bottom most mounting holes.
The X Axis belt is installed the same as the Prusa MK3s. See those instructions for further details if required. The X axis motor should be loosened and rotated inwards, This allows the belt to be pushed into the slots. A flathead screwdriver may help. The motor can then be rotated back and tensioned.

The Bltouch mount is connected to the motor with 4x 8mm countersunk screws. 2x 10mm M3 screws mount the Bltouch to the mount.

Connect all your wiring and the wiring chain with 2x 8mm countersunk M3 screws.

Connect the endstop to the bottom of the X axis idler pulley with 2x 8mm M2 screws. There are a number of different mounting holes. Use the ones which get the nozzle closest to the corner of the heatbed without overhanginging it.

Some software changes are required. Remember to calibrate your Z-offset value before use. Also ensure you run a PID tune and update your esteps as outlined in the E3D instructions. Probe Offset values for marlin configuration:
#define X_PROBE_OFFSET_FROM_EXTRUDER 31
#define Y_PROBE_OFFSET_FROM_EXTRUDER -39
Your Hemera is now ready for action.

A prototype MK3s filament sensor is available for testing via github, and will be published once properly tested. A Pinda2 probe mount is also on the way.