
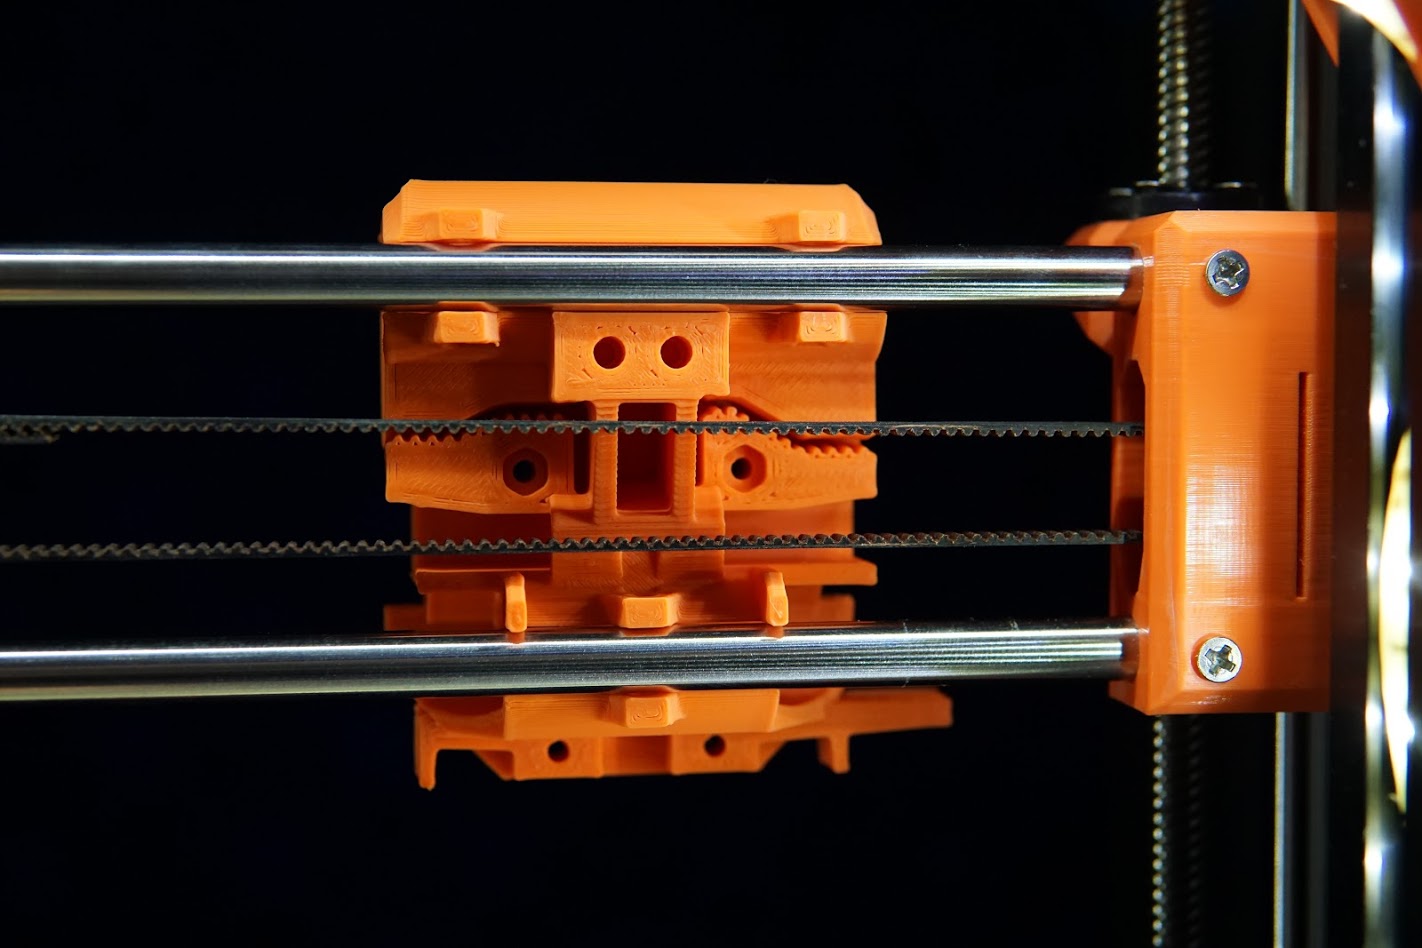
This Titan Aero mount was designed to be compact as possible in the available space. This is done by keeping the hotend closer to the X axis rods than other mounts, minimizing the Z height and width profile while keeping it as strong and light as possible.
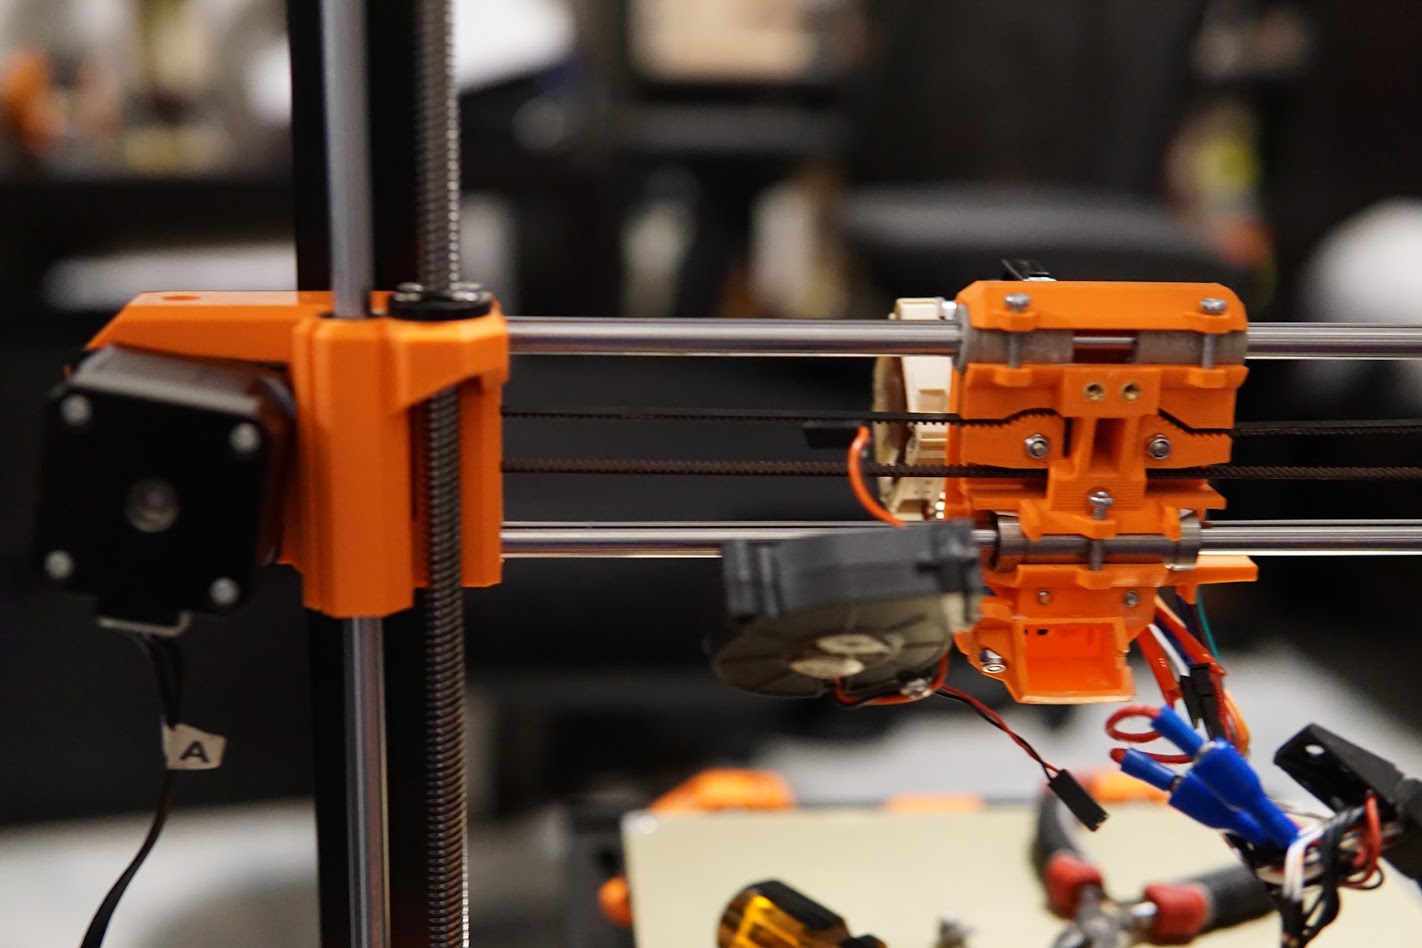
It was designed for the ReDuplicator MK2sx which started life as a Wanhao Duplicator i3. This uses the same X carriage rear bearing plate as the original MK10 Re-Duplicator carriage. It can be found on the original project here.
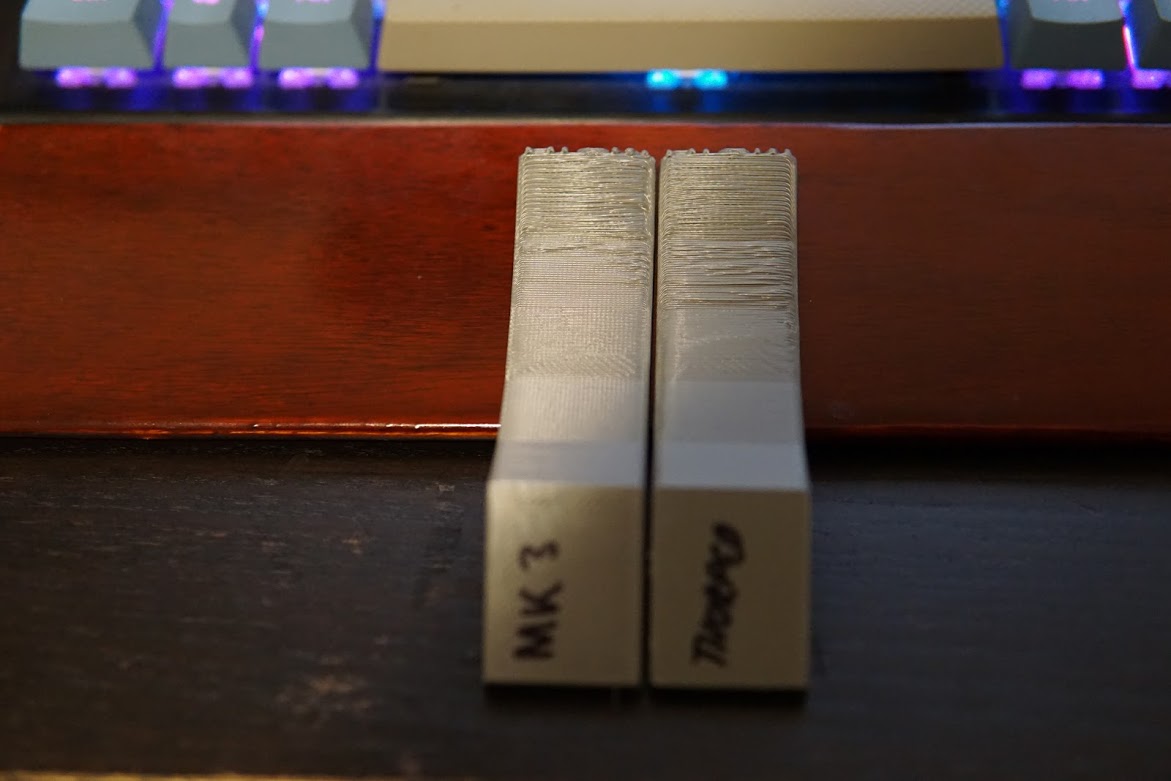
The new shroud is based on the Prusa MK3 one. It results in much better overhang performance. 60 degree overhangs are flawless with some sagging @70 degrees. It is almost comparable to the Dii Cooler via testing.
Make sure your Re-duplicator idler part is the new V2 design it includes additional mounting points for the X endstop. The X-axis endstop is mounted on the bottom of the X-axis idler part. The endstop will need to be relocated to the middle or furthest holes depending on the positioning of your heatbed. However if you’ve already printed the original idler V1, new holes can be drilled in at 5mm intervals with a 1.5mm drill bit.
The new MK3 Based Titan Aero X Carriage Front Plate MK3 V2 and X Carriage Rear Bearing Plate MK3 V2 have different spacing than the original parts. This new carriage can be installed and removed from the x-rods without having to disassemble the printer and are much easier to work with. it also uses a different belt securing method that is easier to tension.
The new required printed parts are the:
- Titan Aero X Carriage Front Plate MK3 V2
- Titan Aero MK3 Part Cooling Fan Mount
- Titan Aero MK3 Part Cooling Fan Shroud
- X Carriage Rear Bearing Plate MK3 V2 (Same part as the MK10 extruder)
- BLTouch Mount (optional).
Installation is very similar to the original MK10 hotend. Four Heatserts are placed into the front of the Rear Extruder plate. Two heat serts are inserted into the rear.

Two optional Heatserts are required on in the the prongs on the X Carriage Front Extruder Plate. If you are not using a BLTouch or similar levelling probe you can skip this.
Merge these two parts together using the 2x 16-20mm M3 screws into the centre screw holes. This can be tricky due to the restricted space. Secure them on the back with 2x M3 nylock nuts.

Insert 2 more heat-sert parts into the Titan MK3 Cooling Fan.

Screw the Fan bracket to the Fan with a 12mm m3 screw and nylock nut. Attach the 50mm blower fan via an M4x25mm screw and M4 Nylock. A rubber washer in between will help to reduce vibrating fan noise.

Use 2 16mm M3 screws through the bottom x carriage screw holes and into this part.
Place your bearings into the carriage. This design allows you to use M3 screws to adjust the tension on the bearing. This is very helpful for Igus bearings. I settled on 2 a copmbination of 2 igus bearing and a misumi LM8LUU to give a smooth easy and quiet movement.


Install the extruder motor and extruder plate as per E3D’s throughout instructions. E3d Titan Aero Instructions

Once completed this should be significantly lighter than the original. The original MK10 Extruder came to 620 grams. This new design comes in at 380 grams, around 240 grams lighter.

Assembly can continue as per normal.
Probe Offset values for marlin configuration
#define X_PROBE_OFFSET_FROM_EXTRUDER -16
#define Y_PROBE_OFFSET_FROM_EXTRUDER -42